Implant-borne custom abutments
-
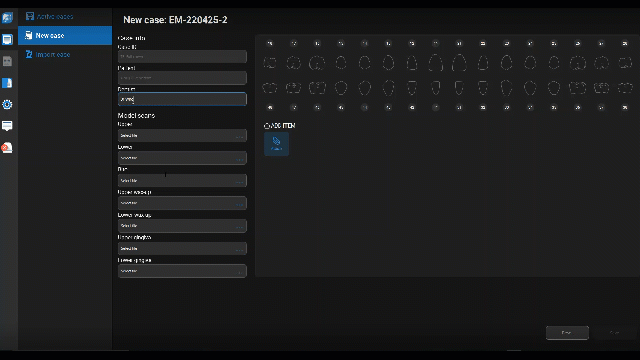
 Create new case.
-
A Case ID is generated, but you can modify it.
-
Enter Patient and Dentist names.
-
Click
 to add model scans. You can view scan files by clicking
  next to them.
 -
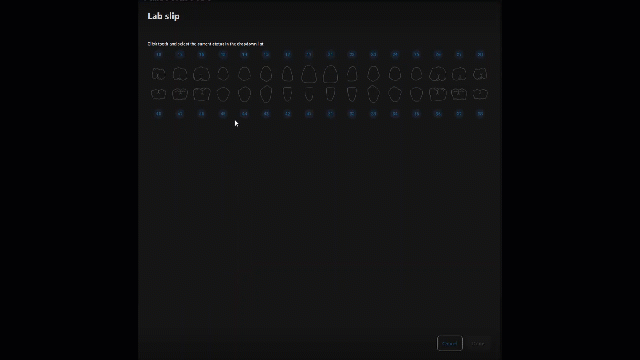
Click anywhere on the dental chart to open the Lab slip.
-
-
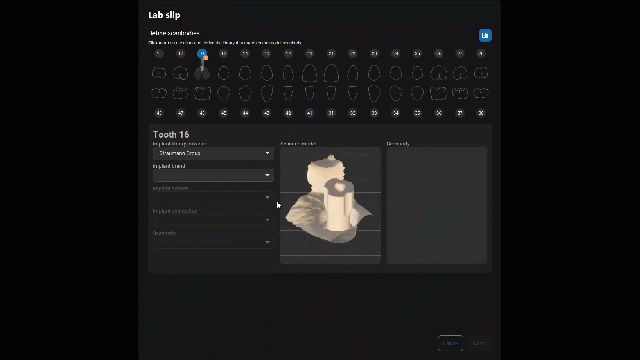
Fill out lab slip.
-
Click teeth to tag them on the dental chart.
-
Select the in-mouth status quo (preparation, implant, missing tooth, tooth) for each tooth.
-
When you identify all teeth, click Done to save and close the lab slip.
-
-
Click Save. The case is listed in Active cases.
-
Click Open.
-
Navigate through the scan files for the Upper, Lower, and Bite and remove unwanted sections.
Use Display to hide the components you don't need to trim.
-
Go to Trimming. Use available tools to remove remaining artifacts.
Tools only work on surfaces that are highlighted in blue.
-
Go to Orientation. Position the scan model on the axes to get the best possible restoration proposals.
-
Specify the Implant library provider, Implant brand, Implant system, Implant connection, and Scanbody to identify the virtual scanbody that matches the one in the scan files.
-
Click Next to move to another implant.
-
Click Done to save and move forward.
 If the implant tag displays
 Fail, the scanbody matching is unsuccessful. In this case, click .
.-
Match scanbody opens.
-
Manually position the scans to overlap the scanbody library.
-
-
Go to Bottom.
-
Fill out lab slip details about the restoration plan, output, and material.
-
Click Done to save and close the lab slip.
-
In Prosthetic component, define the group and component of the implant library.
-
In Fitting, check the cement gap.
-
In Material thickness, set up the minimum thickness.
-
In Emergence profile, use the handles to set up the contour.
Go to Shell.
Click Contacts in Display to identify contact points at a glance.-
Set up occlusal, proximal, and gingival contacts.
-
You can also shape or sculpt to fine-tune the design.
-
-
Go to Core.
-
Define the reduction and the cone angle in the Abutment toolkit.
-
Click Shape and use the diamond handle to set up the abutment axis.
Hold SHIFT when hovering over a pink dot to control all pink handles and size up or down the abutment.
Hold CTRL when hovering over any handle to control all vertical handles and the surface under them.
-
-
Go to Review. Inspect your design and bring final touches.
You can change the Restoration skin and the Arch skin in Display to get a sharper view of the result. -
Go to Export. Select the output folder for the restoration files and click Finish.
Go to Tagging. Click teeth to position tags according to the lab slip.
Go to Anatomy library. Select default anatomies for each tooth.
Go to Anatomy. Use available toolkits to duplicate, fit, shape, and sculpt tooth anatomies.
Want to try it yourself? Download case files.